 brieftodo.com
Protecting Exterior Wood for a Lifetime
For this project I used two ancient techniques for protecting exterior wooden gates, these old methods out perform most modern film finishes for wood.
The first preservation technique I’ll be using is from Japan and called 焼 杉 “yaki sugi” or 焼杉板 “shou sugi ban”.
There are many ancient homes in Japan that have this famous black carbonised wood on the exterior.
The carbon surface stops insect penetration and protects against the harmful effects of sunlight.
The best types of wood to use are cypress or cedar, unfortunately they are both expensive where I live and so I used a Chilean pine for the gates.
I made a quick test of burning the wood with a weed burner at four different grades of intensity, I then washed the wood with some water and a stiff nylon brush in the direction of the grain.
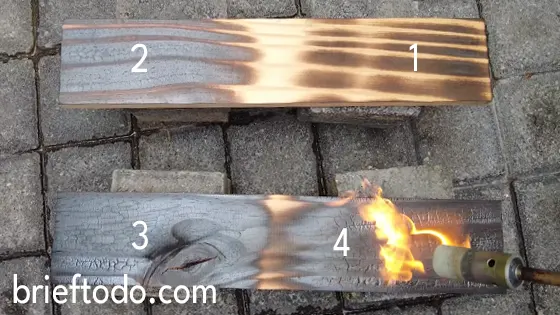
I personally prefer the look somewhere between test two and three but the fourth test would probably give better long-term protection.
I went on to burn all the pieces of cut wood for the first gate.
On to the second process of protection.
I melted 125 millilitres of bees wax using the “bain-marie” method which is heating indirectly via boiling water.
If you use a blow torch to heat the water bath make sure you are outside away from any buildings, a safer method would be to use an old individual electric heater.
After 10 minutes the bees wax has melted, I add 500 millilitres of boiled linseed oil which is flammable hence the blow torch needs to be turned off.
Give the mixture a good stir we end up with a 4/1 mixture of linseed oil to bees wax. Leave the mixture to cool down overnight.

The following day I apply the congealed mixture to all sides of the wood using a rag and protective gloves.
The consistency of the mixture is like grease.
The sheen of the burnt wood surface is amazing after applying this goop.
Make sure you do this process outside as the mixture doesn’t smell too good, the odour does go away as the mixture dries out.
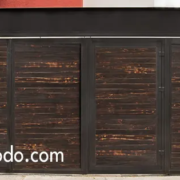
I can show you what the four gates will look like once installed.

I intend to check the condition of the gates every six months
I’m guessing that I will need to reapply the wax / linseed oil mixture once per year to keep the wood in optimum condition.
In theory these gates should last for a generation or more which is good enough for me.
Some of the things I used.
- Gas Torch Burner 2m Hose – https://amzn.to/3PMl3H1
- Vertical LP Gas Tank 20 lb – https://amzn.to/43hmEYq
- Boiled Linseed Oil – https://amzn.to/3ri8YPs
- Bees Wax – https://amzn.to/3O3dj1V
- Cordless Circular Saw – https://amzn.to/3Khb8Go
- Multi-Purpose Table Saw – https://amzn.to/3m0wMor
- Table Saw Push block – https://amzn.to/3EcJSoT
- Cordless Drill / Screwdriver – https://amzn.to/3xwRGxZ
 briedtodo.com
