 brieftodo.com
Preparation for Cleaning a Solar Water Heater
This maintenance should be done every 18 – 24 months, before starting the process check your owner’s manual to find out which type of magnesium rod you will need to purchase and it should cost around $12 USD (2023)
The anode is an important piece of kit which helps your tank to remain internally rust free. These rods are also in hot water storage tanks, magnesium for soft water, aluminium for hard water and zinc for helping to neutralise bad smells.
The solar water heater in this article is fed via a gravity water tank which is 3 ft or 1 metre higher than the solar water heaters storage tank. If you have a pressurised solar water heater the cleaning process is very different to the one explained here.

Some of the things I used.
- Liquid Dish Soap – https://amzn.to/3XFZ2db
- White Vinegar for Cleaning – https://amzn.to/3IaqvOv
- Baking Soda Multi Purpose – https://amzn.to/3XAEqTr
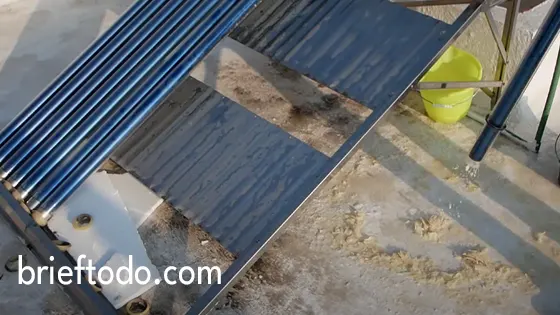
Removing the Solar Evacuated Tubes
I would recommend that you get up early at first light to avoid the possibility of cracking a tube via thermal shock.
You will need a garden spray bottle filled with soapy water, spray around the top of every tube to help them release from any scale present. Slide back the rubber dust seal ring at the top of every tube.
To release a tube rotate it clockwise into the tank and do this slowly as the glass tubes are often stuck due to scale being present. When the bottom of the tube is free from the base plate you can rotate it anti-clockwise and downwards and whilst doing this the tube needs to be above the base plate.
More recent designs of solar water heaters have an improved base plate which makes the tube release easier.
Cleaning the Solar Evacuated Tubes and Water Storage Tank
Hold the tube tightly upside down and shake it up and down, the majority of the scale in the bottom should release and come out. As you can see in the image below these tubes were super dirty. I do the same removal and cleaning process for all the remaining 15 tubes
I then store the tubes in a safe place on top of some polystyrene sheets and then cover them with an old bedsheet so they don’t get too hot
Several of the tubes had scaled crystalized on the outside which can be removed by using a straight edge screwdriver or by soaking them in white vinegar. Here I’m given every tube and internal clean using water and white vinegar to release more scale.
Back to the main tank which still has scale in the base of the tank mixed with water, add some white vinegar to help break down the scale.
An hour later I’m removing the tank drain tap and inserting an thin plastic rod back and forth to help the scale flow out alongside the water.
Now to give all the exterior a good clean with soapy water, the base of every tube has a plastic base cap protector and they also need to be cleaned.
Installing the Solar Evacuated Tubes and Magnesium Anode
I decided to reinstall the tubes early the following morning to avoid any of them cracking due to thermal shock.
Dip each upper end of every tube into soapy water to aid the tube re-installation.
This tank has tube number one is on the cold water inlet side and requires a new magnesium rod to be inserted.
Insert the tube with it’s magnesium rod into the storage tank, rotate it clockwise and up and when the tube clears the base plate turn the tube anti-clockwise and down to rest in the base plate.
Slide the dust ring home up against the tank, then do the same for the remaining 15 tubes.
Refilling and Purging the Solar Water Heater
Open the cold inlet valve to fill the tubes and tank again.
As the heat was rising I decided to protect the tubes with a wet bedsheet to minimise the possibility of thermal shock.
Every few minutes air is being purged by the vent pipe whilst the filling process continues, 30 minutes have passed and the tank and tubes are now full.
Remove the bed sheet and the process is complete.